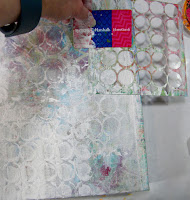
Hi artsy friends! Thank you for joining our first Gel Press Blog Hop! We will have a challenge every month! This gives you the opportunity to play along AND win a Gel Press for yourself! This month you can win an 8" Round Gel Press Plate!!
Enter by going to all of the blogs. Leave a comment on the Gel Press Blog telling us your favorite project! You can comment between now and April 7! Winner to be announced on Gel Press Junkies on FB and Gel Press product page April 8th! You will have your 8" Round Gel Press to make a project to play along with our Earth Day designs April 22! Enjoy the projects and good luck!
Now for my project!
I love spring! The flowers are blooming and everything is green again! And if you live in the south, everything is probably covered with yellow pollen! Excuse me while I get a tissue and sneeze!
I was inspired by spring to create this fun mixed media canvas, and am sharing how I made it in my blog post today.
 |
| Bloom 12" x 12" Mixed Media Canvas |
Supplies:
Canvas Fabric
Brayer
Acrylic Paint
Gesso
Matte Medium
Map paper from an old atlas
Stencils
Stamps
12" x 12" Canvas
1. I love to mix similar colors on the Gel Plate, so I put a few dabs of each of my favorite bright acrylic colors on the 8" round plate.
2. Use the brayer to smooth out the colors, without mixing them too much.
Although I could have gessoed the canvas for a smoother print, I wanted that textured look that I knew I would get using raw canvas.
3. No need to clean the plate before loading on some darker purple.
I printed on top of the first print.
3. Next I used a clean piece of canvas and lavender paint with a rubber stamp.
4. For the third print I layered three colors: First orange, adding some marks with the edge of an old gift card.
Without cleaning the plate, I added pink paint and a cool circle stencil and printed over the orange.
For the third layer, I used the 4" round plate as stamp.
Loaded it up with yellow paint and placed this funky stencil on the plate.
I left the clear acrylic sheet on the back of the plate so that I could "stamp" it,
pressing it down in the center of the canvas I just printed with orange and pink paint.
I love the color combo on this one. Do you see where I used the stamp from the purple canvas?
5. Flowers need stems and leaves, so I printed some strips of canvas with a few shades of green paint.
6. To add some contrast to the prints, I used Stencil Girl map stencils and black paint.
I applied it using a makeup sponge and a pouncing motion to ensure a clean image. The trick is to use a small amount of paint.
I love the contrast that the black brings to these prints. These stencils are perfect because of the fine lines they have.
7. Time to cut the prints. I used jars of paint as guides and a pencil to draw circles and cut them out in 3 different sizes. I tore the green prints into strips to create the frayed edges for the stems and free-hand cut the leaves.
8. I love to add sewing to my projects, and these flowers were the perfect fit for some messy stitching. Plus it was a great way to attach the layers.
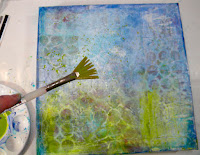
9. Now for the canvas background. I used map paper from an old atlas that I printed using a circle stencil and the round Gel Plate. Tore it to fit the canvas and glued it down using matte medium.
To tone down the colors, I painted watered down gesso over the top and wiped some of it away with a baby wipe. Then added some texture with a small circle stencil and heavy gesso.

After all of the gesso dried, I added some blue, turquoise and green Art Anthology mediums, since they are transparent and allow the layers underneath to show. I also splattered some green paint around the canvas.

10. Lastly, I glued down the flowers, stems and leaves using Beacon Zip Dry glue. I added some green thread underneath the flowers for added texture and interest.
I decided to add a word that I cut with my die cut machine to finish it off.
Shop at gelpress.com
Pinterest: https://www.pinterest.com/gelpress/


really enjoyed your use of color here with this mixed media canvas... the flowers are wonderful!
ReplyDeleteWow Kathy! I have to try using fabric. I just made a canvas with three flowers layering them just like you did, but I used gel printed paper. Yours is beautiful!
ReplyDeleteI've done the same thing with paper and also sewn them and they look great too. The canvas gives a totally different look. And if you gesso it first, it gives it a different look too.
DeleteOh wow. You have just given me a great idea. I need to make a growth chart for a friend of mine and she said do what you want. Been sitting here wondering what to do and now I know. Going to make flowers. Thanks for the inspiration.
ReplyDeleteThat is a brilliant idea!!! I would love to see it when you are done!
DeleteEndless possibilities!!! These flowers are so pretty!!!
ReplyDeleteI love working with raw canvas too! This is absolutely amazing, I can't stop looking at it.
ReplyDeleteI love your canvas, it turned out so pretty!
ReplyDeleteGreat idea! Nice texture with the raw canvas.
ReplyDeleteThis is gorgeous!!! Such talent!! Going to give this technique a try for sure! Thanks for the inspiration!!
ReplyDeleteLove these gorgeous round flowers, so happy! Adore the texture of the canvas. Thanks so much, I have to try this!~kim
ReplyDeleteI used to be a fiber artist. Love the way mixed media translates from paper to fiber. Lots to think about.
ReplyDeleteWow you show so many great techniques!
ReplyDeleteSo pretty - great colors, and love the use of the fabric!
ReplyDeleteI love your project and the colors you used!!
ReplyDeleteThank you all for your kind comments!
ReplyDeleteLove your fun and funky flowers! Very cool!
ReplyDeleteWow- how cool is this!!! Love the flowers!
ReplyDeleteI love this.....I want to try canvas.
ReplyDeleteLove the flowers and your technique. HOping I will be able to create a canvas just like yours very soon.
ReplyDeleteLove the flowers and your technique. HOping I will be able to create a canvas just like yours very soon.
ReplyDeleteLove the messy stitching! (It's the only kind of stitching I do!).
ReplyDeleteMe too! Thanks for your comment!!!
DeleteAwesome! This canvas just makes me happy! Thanks for sharing! God bless.
ReplyDeletethis idea looks very enjoyable I am going to have to try this love the colours
ReplyDeleteGreat info and inspiration and beautiful project. Thanks so much.
ReplyDeletethis is so awesome!! Now I MUST use my Gel Press :)
ReplyDeleteAwesome!! what a great way to you fabric!! and those flowers, beautiful colors you've used! i love it,
ReplyDeleteWiebine
This is so pretty. Love the colors!!!
ReplyDeleteThis is super cute!!! I love it!
ReplyDeleteAlthough I am not sure I will be printing on canvas in the near future, your directions gave me some really good ideas! I love the black lines you got using the stencils. Thank you so much for sharing your creativity.
ReplyDeleteLove the designs you made with the gel press!
ReplyDeleteSuper cool! Love the depth to your piece. Your flowers are so cute!
ReplyDelete