Wednesday, November 4, 2015

Catching Up on Inspiration Wednesday

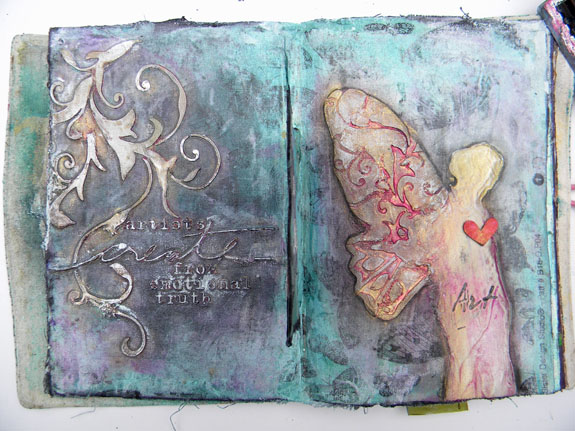
I got really behind with Inspiration Wednesday and spent a few days catching up.  So I thought I would share my completed pages. Those of you who take the online class will know a bit more about these pages.  For those who don't, Inspiration Wednesday is a bi-weekly art journal class online taught by Donna Downey.  Click on the link to find out more information.  

7-08


This one is a tribute to my constant companion, Lucy, my long haired dachshund.  My daughter used to draw pictures of her and I wanted to copy her since I didn't have an original. I also decided to use 2 inspiration journals instead of adding another signature to one.  So this is the first page in the second one.  

7-22


This one is just so weird looking.  I used papers that I had made a long time ago using National Geographic magazine pages and CitiSolv cleaning concentrate.  If you want to know more about this process, check it out here.  

8-08


First of all, I LOVE using fabric in this journal.  It really strengthens the pages and gives me a pattern to work with.  You can hardly tell that I used a black and cream butterfly pattern because I piled on so many layers.  I love this page and am doing a canvas that I will share in another post.  

8-22


This page is one of my favorites.  I used some Chinese newspaper for the image transfer on one side and book text on the other.  The newspaper worked great so I will be using that again! I used a Stencil Girl globe stencil for the large circles.  

9-02


Another favorite, this one was surprisingly easier than I though.  I plan on putting this on a canvas in the future too.  

9-16


I used a few deli paper gelli prints for the background of this one then found this sketch of a face that I made a while back, cut it out and slapped it on.  Added some gesso and yellow paint, the stamp and the tag and was done.  Fastest one so far! It's a bit chaotic, but I love the bright colors.

9-30


I didn't have the same stencil so I used a circle stencil with another stencil inside the circle.  I used word stamps but went over them with a calligraphy dip pen and india ink, which worked out well.  

10-14


I love how I am using lots of things I have laying around in this process!  I especially like the tag above that I had embossed and put in a drawer.  It worked out perfectly for catching colored glaze in the nooks and crannies!  I added some copper and gold paint to some of the raised areas, and the stamp, "you will shine".  

I'd love to hear from you so leave your comments below and let me know which one is your favorite! 


Tuesday, September 29, 2015

Rainy Day Watercoloring with Ken Oliver Color Burst

Ken Oliver Color Burst watercolor powders seem to be the "new thing" among the craft crowd, so of course I had to try them!  They come in a small "eye drop" container and the colors can be purchased separately or in sets, like the Bright Assortment set below.

So when my local scrapbook store got them about 3 months ago, I purchased a few, brought them home and they sat on my desk for a while.  Then I put them into my watercolor storage box because I had deadlines to meet and other creative endeavors to explore.  Until the other day when I got an idea.  

First, I need to explain that in South Carolina, where I live, it is sunny, warm and humid most of the time, with a thunderstorm here and there during the summer months.  We rarely have a whole day where it just rains and rains.  But for the last 4 days it has rained all day and night, with no sun in sight!  So here is where my idea comes in........what if I put some of those Ken Oliver Color Burst powders on watercolor paper and just set it out in the rain?  This is either the most brilliant idea I've ever had, or or the laziest one! Imagine, having the rain do the painting for me while I get other things done!!!  

Let me share with you the inspiration for this idea, other than laziness or creative desperation.  The most brilliant moment on my favorite television show, Project Runway, came during Season 13, Episode 8. The challenge was that the runway show would be a first ever "rainway" show, and they would spray water onto the runway as the models strutted wearing the contestants' creations.  Sean Kelly had the ingenious idea to create a white dress with different colors of Rit Dye (powdered color dye) sewn inside the dress, so that when the water hit it, the dye would react and color would burst out onto the white fabric.  It was a big risk because he had no idea if it would work.  But the payoff was big and he ended up winning the challenge. 


You can watch the video here: 

So I set out two pieces of 12" x 12" Strathmore 400 Series watercolor paper and sprinkled Alizarin Crimson, Orange, Violet, and Blue on one, and Pthalo Green, Blue and Violet on the other, and let serendipity do it's thing!   


It wasn't pouring down rain, just a constant misty sprinkle so it took a bit of time for all the colors to appear.


Well, I had to run out for about 40 minutes and when I came back it was raining harder. The color had pretty much pooled up and I removed the paper and let it dry completely. This resulted is beautiful soft blended colors. 


I wondered what kind of designs I would get if I watched the process more closely and removed it from the rain before the colors were completely diluted.  So I put one more piece of watercolor paper out and added Green, Blue, Violet and Alizarin Crimson.  Then I set my iPhone timer for 15 minutes so wouldn't forget to check it.


After 15 minutes:

I kept checking it every 15 minutes and it took about 45 minutes to get to this point.  I carefully brought the paper in and let it dry completely.  


After completely dry:


I love the bold, bursts of color that was created with the raindrops splattering onto the paper. Now to figure out what to make with them.......

Thank you for visiting my blog and stay tuned for my next post featuring projects using these cool papers.  Now go make something creative!

Kathy :)


Saturday, May 2, 2015

Creating Patina

I have a tutorial for you today using Ten Second Studio VerDay Paints.  I'm not a member of their design team and I gain nothing from promoting them, I just I LOVE the paints and wanted to share with you what they can do. I'm using the 2 oz.Verday Paint Kit that includes four metallic paints, (copper, iron, brass and bronze) and a patina spray solution (click on the name above to order).


The paints actually contain real bits of metal so adding the patina solution results in real rust, and aging. I first started using them last year for Scrap n' Art  Magazine and was giddy with the results!  And it is so easy to create real patina finishes.

Here is an overview of the different patina's that result from each metal:

Sorry for the bad lighting!


I first painted each tag with each of the four metal paints and let them dry.  Then I painted them again and while they are wet, I sprayed the patina solution on them.  The fun part is watching the patina form.  It happens fast, even though the directions say it takes a few hours.

Patina Planter
So today I will share with you how I created the worn, patina on this cool planter that I've been killing plants in for the last few years. I'm going to deviate from the Ten Second Studio directions a bit.

Before
First I started with a light coat of gesso because there are some places where the first layer of gray paint was chipping off and I felt that it needed a surface for future paint to stick to.  I left some of the gray showing in the cracks and crevices. Look, she's smiling because I'm making her beautiful!


I used Basics (cheap) Liquitex Copper paint as a basecoat because I have lots of surface to cover and VerDay paints are expensive and I will still get a great result. Yea, the real reason is I'm cheap!!! Note: The patina will only appear on the areas where I use the VerDay paints, not the Liquitex copper base coat.

Planter with Copper Basecoat
Now to add the Verday paints in copper and iron.  The copper will produce a blue/green patina and the iron will create a rust patina. The iron paint has a foul smell!!!  But it is worth the results, so I carried on! I let them dry completely.
Painting on Iron Paint
I add another coat and while the paint is still wet, I sprayed the Patina solution onto the wet paint and waited for the magic to happen. I did this step in sections so that the paint didn't dry.  I also did the iron separate from the copper.

Adding Patina Solution
 I left it for the night and when I came back the next morning, here is what I found:


I think she is much happier now!


Isn't this the coolest photo!!

And here is where she will live:


I  hope I don't kill that plant! It's partially not my fault since the planter has no drainage and it's a shallow and not much room for dirt and roots! So we will see what happens.  

Here are some other projects using the VerDay Paint Kit:

Patina Leaves Canvas Detail

Patina Leaves Canvas

Patina Leaves Canvas


In the Patina Leaves Canvas, I die-cut aluminum can material using the Tim Holtz Bigz Tattered Leaves Die and embossed them using different designs.  I painted them with green and orange acrylic paints so that I would have some bright colors peaking through the patina finish.  Then I painted them with VerDay paints and sprayed them with the solution and let the magic happen! I then sanded the raised embossed areas to let some of the aluminum show. The little upholstry tacks were treated with the VerDay paints also.

I recently posted a project on Art Anthology's blog featuring a canvas using their paints.  I wanted to add some Tim Holtz gear embellishments to the canvas so to create rust on them, I used iron VerDay paint and patina solution. The metal gears took the paint beautifully and created genuine rust!


So if you are interested in creating a great patina finish on almost any surface, consider the Ten Second Studio VerDay Patina Paints.

Thank you for visiting my blog today! Please leave me your thoughts, questions, comments below.  I'd love to hear from you!

Kathy