Showing posts with label Stencil. Show all posts

Friday, September 30, 2016

Art Journaling Therapy With Gel Press®

For our blog hop today we are focusing on health and wellbeing. Make sure to check out all of the talented designers to see how they interpret our theme this month. You will find the links at the end of my post.

Health and Wellness Art Journal Page
Art journaling is my way of figuring things out in more ways than one.  It's a place where I play with a new product or technique. But it's also a way of purging or recording thoughts, quotes, ideas and feelings in a visual and creative way. There is something very therapeutic about writing my thoughts and feelings onto a blank page then covering them up with paint, stamps and stencils. Here is an art journal page that I made to remind myself to keep mind, body and spirit in balance for my own health and wellbeing.  For this page, I used the large format, 12" x 14" Gel Press Plate.
Balance Art Journal Page
See my process creating this page in the snapguide below.

Check out How to Create an Art Journal Page With Gel Press® by Kathy Adams on Snapguide.


Balance Art Journal Page
Spiral Bound Gel Press® Journal
An easy way to make a quick journal is to use Gel Press® prints and bind them using a Bind-It-All spiral binding machine. If you don't have one, office supply stores like Office Depot have inexpensive spiral binding services. Check out my video showing how I made the covers using Gel Press® Plates.


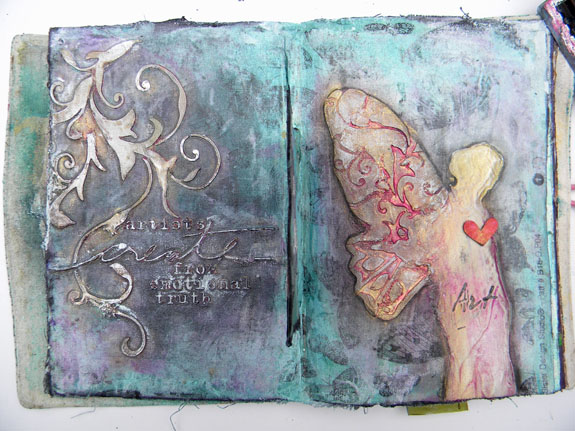
Sometimes just making backgrounds in my art journal is therapy! I loved making these pages using some of my favorite StencilGirl Stencils. Each one started out as a gel print.


The idea behind an art journal is not to make a masterpiece but to play, work out ideas or use a new product. Here are a few more pages in this art journal doing just that.

Art Journal Page Using Face Stamp
An Exercise in Letting Go of Perfection
Junque Journals
My favorite journals are the ones I learned to make while taking Julie Balzer's "Make Your Own Junque Journal Class".  They have a hand-sewn binding so there is no gap between pages like on a spiral bound journal.  I made five junque journals, most using gel prints and patterned paper.  The covers are created using canvas panels, Gel Press® prints, stencils and stamps.


Here are some of my favorite Junque Journal pages.


Collage Art Journal Page 
Collage Art Journal Page
Thank you for visiting my (long) blog post today! Here are the links to the other designers blogs:

                               Kathy <------you are here


Art Journaling Related Links:
StencilGirl Stencils
Julie Balzer's Make Your Own Junque Journal Class
Inspiration Wednesday
How To Make An Inspiration Journal
Wilna Furstenberg's Art Journaling Videos

Wednesday, November 4, 2015

Catching Up on Inspiration Wednesday

I got really behind with Inspiration Wednesday and spent a few days catching up.  So I thought I would share my completed pages. Those of you who take the online class will know a bit more about these pages.  For those who don't, Inspiration Wednesday is a bi-weekly art journal class online taught by Donna Downey.  Click on the link to find out more information.  

7-08


This one is a tribute to my constant companion, Lucy, my long haired dachshund.  My daughter used to draw pictures of her and I wanted to copy her since I didn't have an original. I also decided to use 2 inspiration journals instead of adding another signature to one.  So this is the first page in the second one.  

7-22


This one is just so weird looking.  I used papers that I had made a long time ago using National Geographic magazine pages and CitiSolv cleaning concentrate.  If you want to know more about this process, check it out here.  

8-08


First of all, I LOVE using fabric in this journal.  It really strengthens the pages and gives me a pattern to work with.  You can hardly tell that I used a black and cream butterfly pattern because I piled on so many layers.  I love this page and am doing a canvas that I will share in another post.  

8-22


This page is one of my favorites.  I used some Chinese newspaper for the image transfer on one side and book text on the other.  The newspaper worked great so I will be using that again! I used a Stencil Girl globe stencil for the large circles.  

9-02


Another favorite, this one was surprisingly easier than I though.  I plan on putting this on a canvas in the future too.  

9-16


I used a few deli paper gelli prints for the background of this one then found this sketch of a face that I made a while back, cut it out and slapped it on.  Added some gesso and yellow paint, the stamp and the tag and was done.  Fastest one so far! It's a bit chaotic, but I love the bright colors.

9-30


I didn't have the same stencil so I used a circle stencil with another stencil inside the circle.  I used word stamps but went over them with a calligraphy dip pen and india ink, which worked out well.  

10-14


I love how I am using lots of things I have laying around in this process!  I especially like the tag above that I had embossed and put in a drawer.  It worked out perfectly for catching colored glaze in the nooks and crannies!  I added some copper and gold paint to some of the raised areas, and the stamp, "you will shine".  

I'd love to hear from you so leave your comments below and let me know which one is your favorite! 


Tuesday, February 3, 2015

Gilding Flakes And A Secret

Whenever I create a project for Scrap n' Art magazine, I have to wait two months to share it anywhere else.  So here are some projects I could not share till now.

Stars
I used watercolor paper and lots of  Dylusions Crushed Grape spray with the Starry Night Stencil Girl stencil. On the chipboard and wood stars, I used IndigoBlu Mega Flake gilding flakes to add the sparkle.  I layered the photo with some Gelli Arts gelli prints that I already had, then used a star edge punch that didn't much like that thick watercolor paper.  Those punches came out really messy!!  I went with the "mess" and I really love how this one turned out!  Note:  My son HATES his picture taken and I really had to bribe him to get this one!!  So don't tell him about this blog post!!!!

Stars Detail

Stars Detail

Be Fearless started out as a fun journal page that needed something.  How about some of those IndigoBlu gilding flakes!!  So I applied the gilding glue through a Crafter's Workship circle stencil then applied the flakes.  Check out my IndigoBlu Mega-Flake tutorial this month in Scrap n' Art magazine.  

"Be Fearless" Before Gilding Flakes

"Be Fearless" After Gilding Flakes
I used the Stencil Girl Uplifting Words stencil to bring out some of the words with a black pen, then added the quote on the left page. The sparkle took this page to the next level!


Hope you enjoyed my projects!  I would love to read your comment below, so don't be shy!!!